Using the General File System
Updated Apr 16th, 2024
Who is this guide for?
Any Users
The General File System is where you can add internal documentation that are not client related, for example, Staff Holiday Requests or your own Health & Safety Procedures
A guide on how to use the General File System
Accessing the File System
To access the File System, navigate to Osprey Home > File System > General File System (New)
Any previously saved documents will appear here.
Add a document to the File System
To add a document to the file system, navigate to Osprey Home > File System > General File System (New).
Click the New button, and select New.
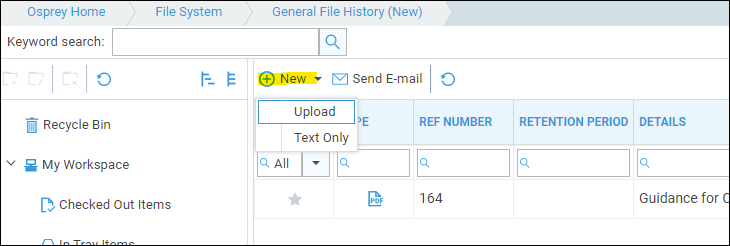
To add a new file, select Upload.

Similar to the client Matter History you can add a custom type if you wish, and a folder. Select the … button alongside the File**: box to select the file you want to add. Enter an optional processed date and retention period, Details are mandatory and will form the details line visible when looking at the file history. Click Save when you are done.
You can also drag and drop files into the File History. To do this, open the File Explorer on your PC and navigate to the folder in which the documents are stored. You can multiselect to drag and drop more than one document at a time.
Please note that the size and quantity of documents you can upload in one go will depend on your internet connection. It is not recommended to try to upload more than about 20-30 MB in one go.
Amending a file in the File History
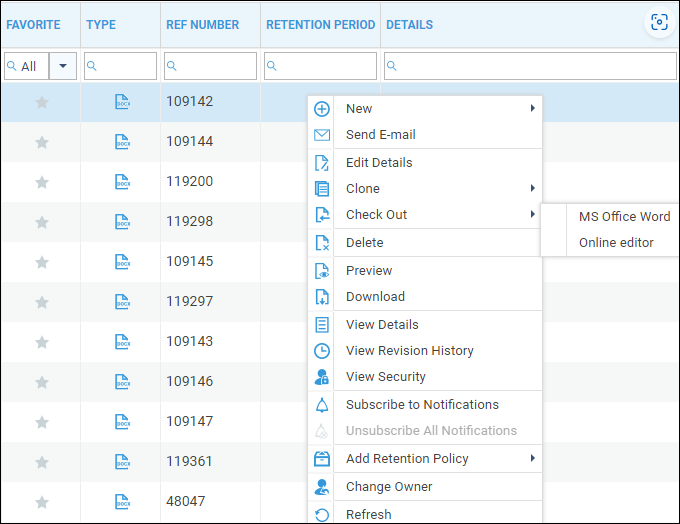
You can check out and amend documents saved in the file history in the same way as in the clients Matter History.
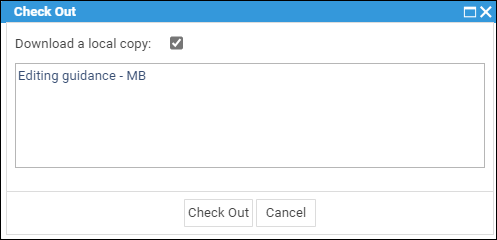
Right click the document you want to amend, and click Check Out.
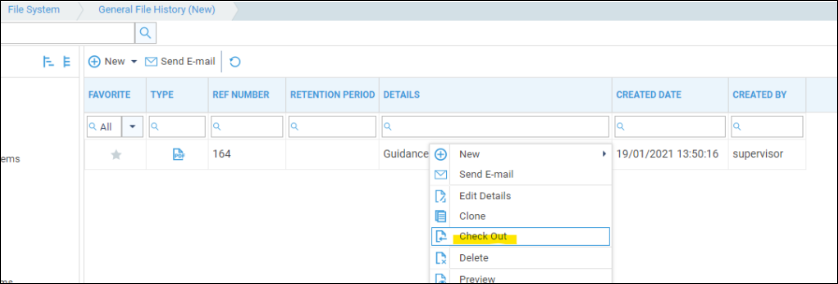
Enter an optional comment and click Check Out. If the file is a PDF you will need to download a local copy.
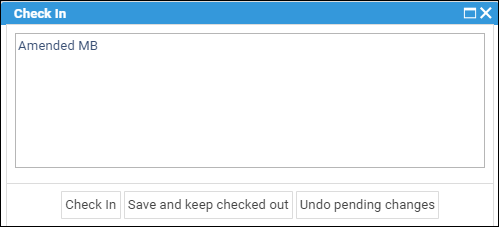
Make your modifications and close the document. If your document is a Word or Excel document, simply enter a check in comment and click Check In.
Viewing document revisions
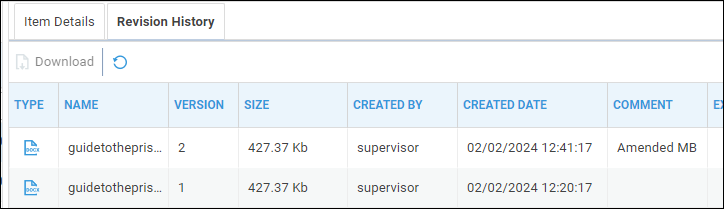
All versions of documents you have amended are stored under the Revision History tab of the details panel. Simply click the document and the details panel will appear on the right hand side of the screen. Right click to see a list of actions.
Running a general document
To produce a new document, navigate to Osprey Home > File System.
Any General Documents will be available here. Click the Select icon against the letter you wish to run. Word will launch with your chosen document open. Amend as you need to and the close the document and save it as you normally would when using Osprey.
Further actions
The document is then saved into the General File System.
The General File History works in exactly the same way as your Matter History, with a list of actions available upon right-click.