Understand KPI results
Updated Jul 13th, 2023
Who is this guide for?
Accounts Supervisors, Case Management Supervisors and System Supervisors
You can set up KPI charts to show:
- Completed Matters
- Time Spent Billed
- Files Opened
- Time Spent WIP
- Fees Billed
- Outstanding Fees
- Fees Received
Step 1
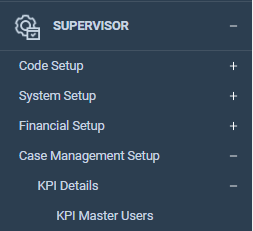
First you will need to link the reports you want to see to the users who will need to be able to see them. Select the ‘Supervisor’ tab and now go to ‘Case Management Setup’ and then select the option for ‘KPI Details’.
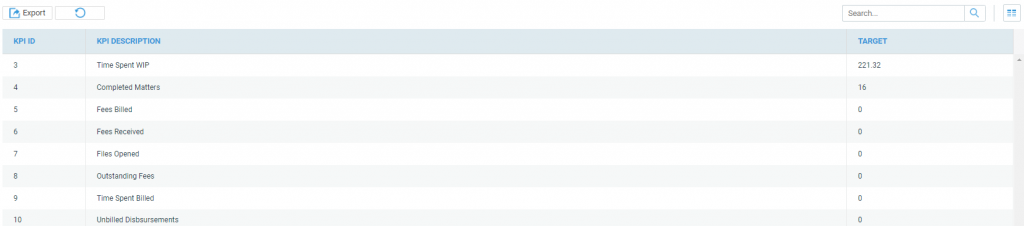
When you right click each KPI report, you will have a ‘Link Users’ option.
Tick the box alongside each Osprey user who you wish to have access to this KPI, then click the ‘Link/Unlink’ button at the top of the screen.
Step 2
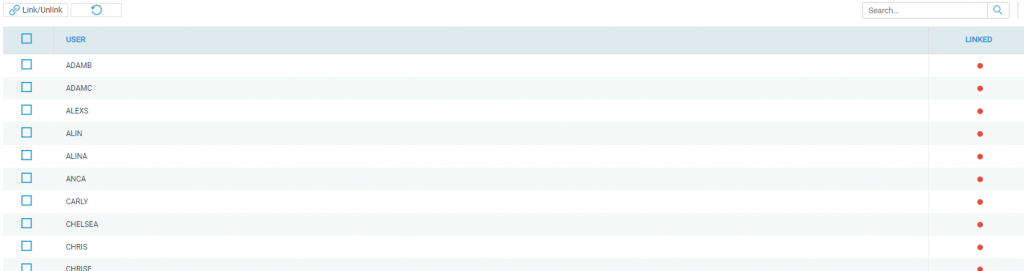
You will now need to link to each user the fee earners whose KPIs they are permitted to see.
Under the ‘KPI Details’ area of the ‘Case Management Setup’ options, select ‘KPI Master Users’.
Step 3
Right clicking on each user will give you the option to ‘Link Fee Earner’

From the list of available fee earners, select the fee earners whom this user is allowed to view KPIs for, then click the ‘Link/Unlink’ button at the top of the screen.
Step 4
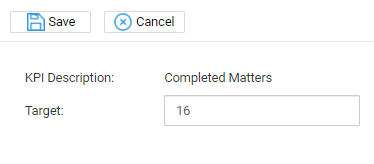
You may also wish to add targets for the KPIs so that you can compare target and actual figures. To do this, under the ‘KPI Details’ area, click the ‘edit’ button that appears when you right click each KPI that you wish to set a target for. Enter the target figure and click ‘Save’.
Step 5
Now, navigate to the Osprey Home page. You should now see some results in the KPI section at the top of the screen.
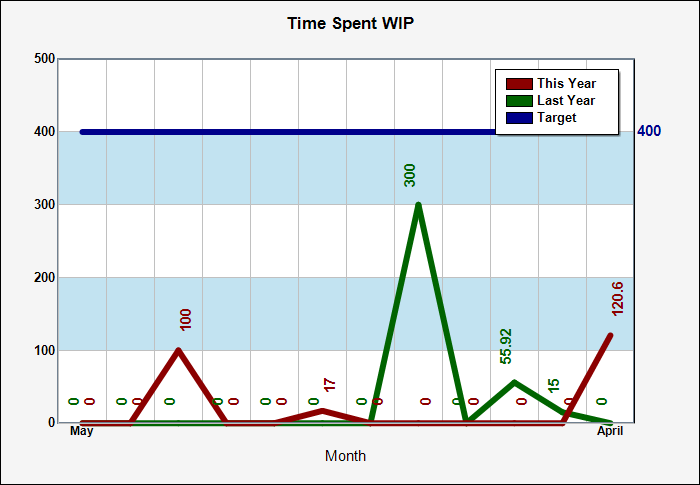
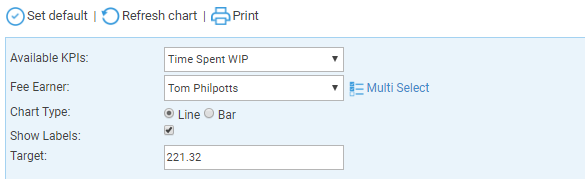
Choose the KPI you wish to view, then the individual fee earner.
If you wish, you can also click the ‘Multi Select’ button to and tick several fee earners – this will allow you to see totals for all fee earners selected.
You can choose between a line or a bar graph, and there is also an option at the top of the screen to print the results.
Please note that the ‘Set As Default’ button only relates to the available KPI chosen, and not any fee earner selections you have made.
The below information should assist you in understanding where the KPI results come from.
| Chart Name | Information |
|---|---|
| Completed Matters | Can be compared to the Completed Matters report in Reports > Analysis. It uses the Date Completed field in the matter details page (this is filled on completion of a workflow). |
| Time Spent Billed | Can be compared to the Time Spent report in Reports > Time. Uses the total of Billed Time only. |
| Files Opened | Can be compared to the New Matters report in Reports > Analysis. |
| Time Spent WIP | Can be compared to the Time Spent report in Reports > Time. Uses the total of Unbilled Time only. |
| Fees Billed | Can be compared to the Bills Rendered report in Reports > Client Financial. The Costs Ex. figure is used. |
| Outstanding Fees | Can be compared to the Unpaid Bills report in Reports > Client Financial. The Amount Due figure is used. |
| Fees Received | Can be compared to the Bills Paid by Fee Earner report in Reports > Client Financial with the Report Type set to Paid Bills. |