Configuring email signatures
Updated Apr 22nd, 2024
Who is this guide for?
Case Management Supervisors and System Supervisors
Osprey can be set up to use one of either:
- System Signature – this is the same for all users/branches.
- Branch Signature – this can be set differently for each of your separate branches.
- Allow User to Select Signature – when this option is set, your users can select which signature they want to use, along with creating their own.
Set up, system signatures, branch signatures and individual signatures on Osprey
Supervisor Setup – set your default signature behaviour
Supervisors will need to set up the system to determine how the signatures work.
Supervisor > System Setup > System Settings > Edit.
Scroll down until you locate the section headed Email Signature Behaviour:
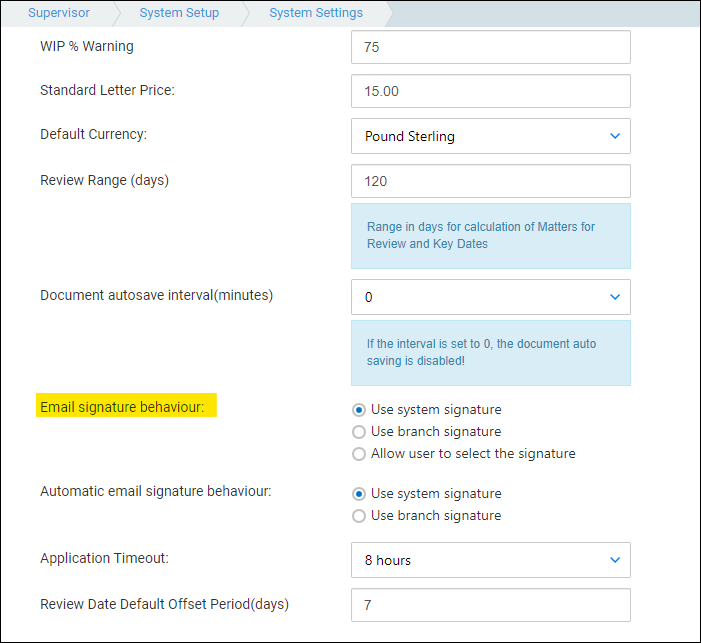
Select the setting you require, then scroll back up to the top of the screen and click Save. The default setting for new users is to Inherit From System, so whatever you set here will be the standard setting.
Supervisor setup – edit your users
To enable different settings for different users, each user also has the option to Inherit from system/Use Branch Signature/Allow user to select.
Navigate to Supervisor > System Setup > Users. Right click the user you wish to edit, and then scroll down to the Email Signature Behaviour section:
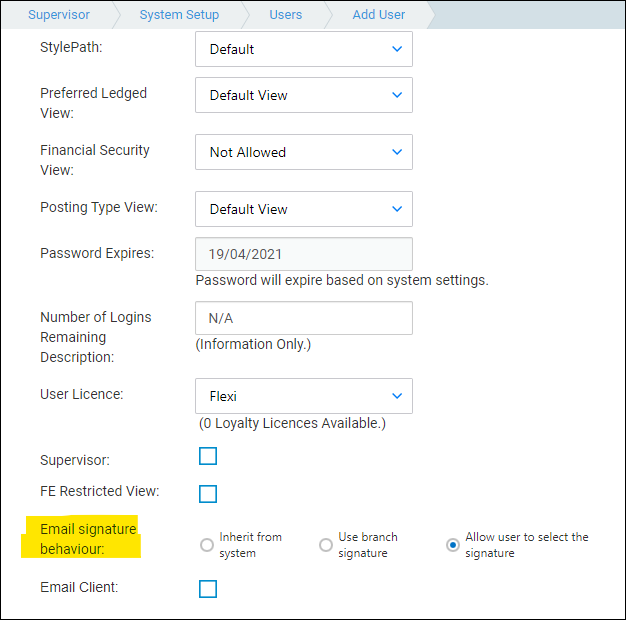
Select the option you require, then scroll back up to the top of the screen and click Save.
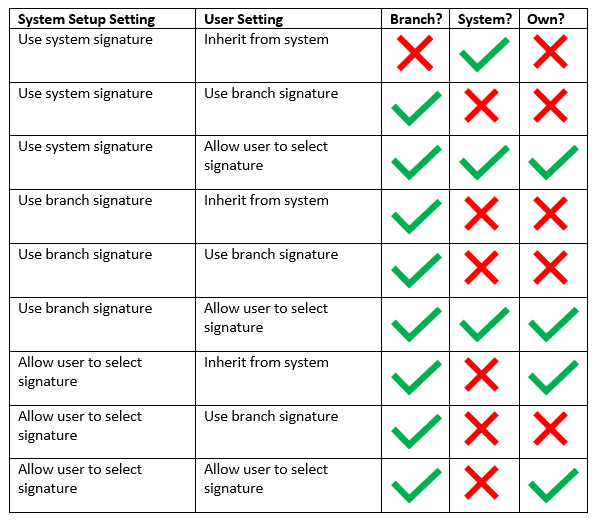
Results grid – system settings vs user setting
The table below shows all the combinations of System Settings and User settings, and which email signatures may be used.