Set up and use Requisitions
Updated Apr 17th, 2024
Who is this guide for?
Accounts Users, Accounts Supervisors, Case Workers and System Supervisors
You can allow your users or fee earners to request cheques, bills and other postings to be made to the client ledgers in Osprey.
Within Osprey it is possible to allow non-accounts users to request when certain postings should be made.
Set up the Authoriser
You will first need to ensure that at least one of your accounts users has the correct authorisation to accept or reject and post requisitions.
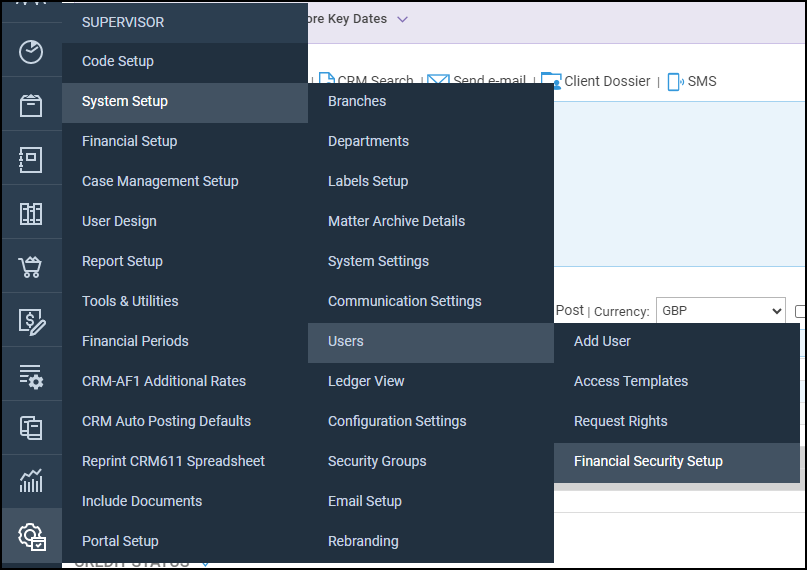
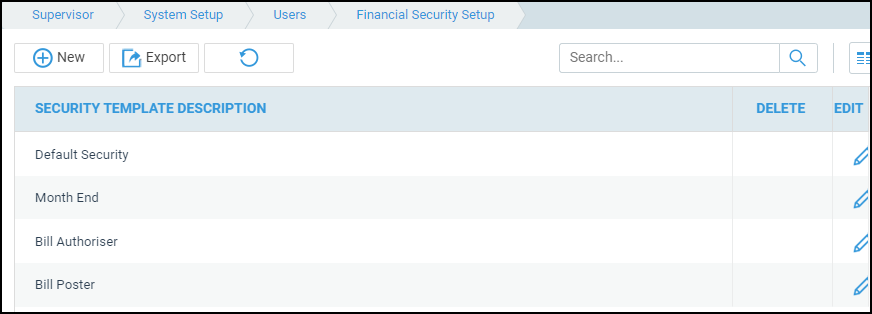
You will now be able to view all of your available Financial Security templates.
One of your default templates will be called Month End and is normally assigned to the user in charge of accounts who will be permitted to run your month end procedure. To use this template, click the ‘Edit’ icon alongside it. Alternatively, you can create a new template.
Select Banks & Journals and click Update
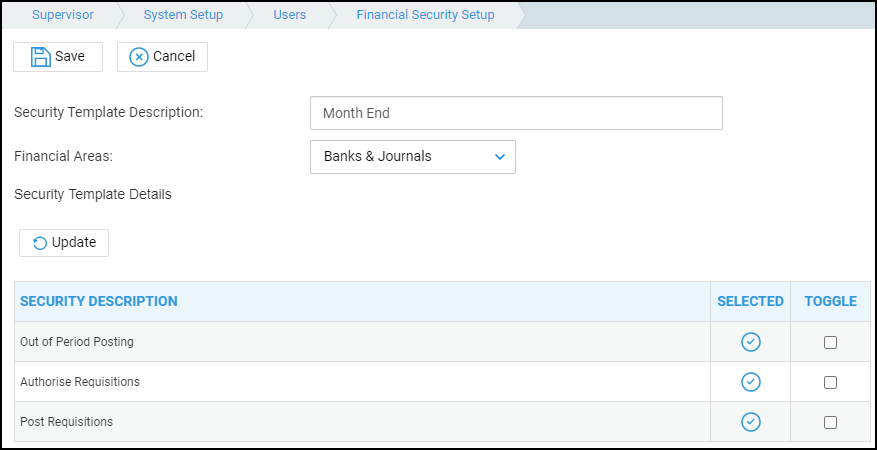
Ensure that Authorise and Post Requisitions are both ticked, by ticking the ‘Toggle’ box alongside the option, then clicking ‘Update’. Now select ‘Save’.
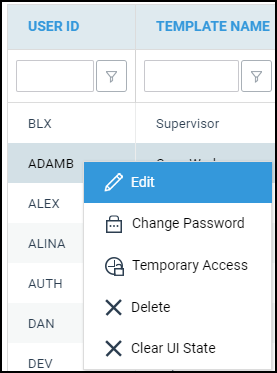
Now, navigate to Supervisor > System Setup > Users
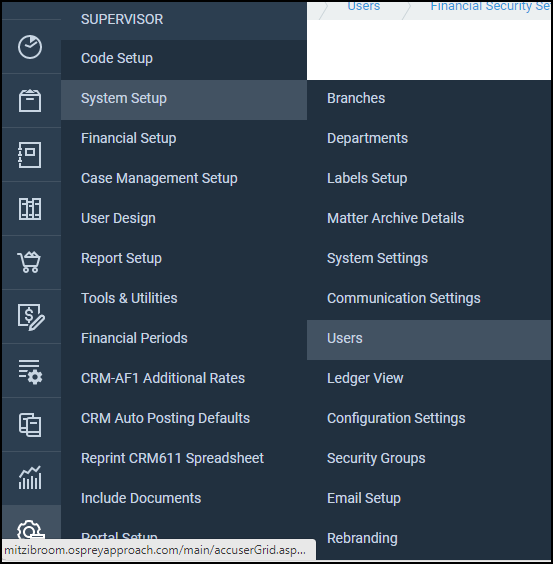
Right click on the user you want to grant this access to and select ‘Edit’
Ensure that their ‘Financial Security View’ is set to the template which allows posting and authorising of requisitions.
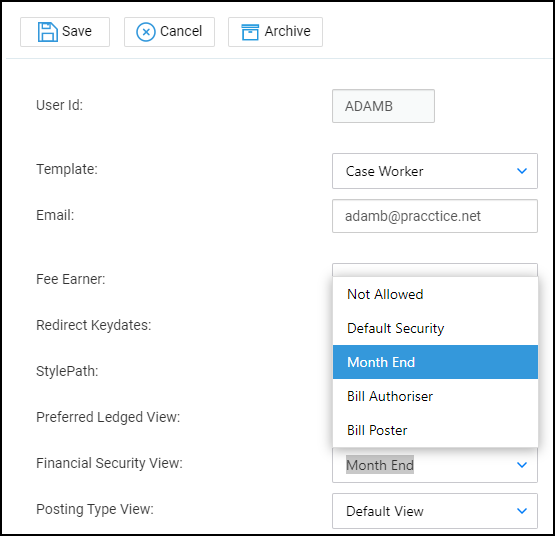
Click ‘Save’ to save any changes.
Now that you have set up the authoriser/poster, your users can start to request cheques, bills and other postings.
Perform a Requisition.
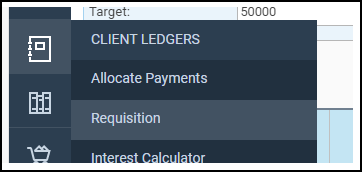
Ensure that you have selected the client you want to raise a request against. Navigate to Client Ledgers > Requisitions.
Your Requisition Form will now open.
Choose the requisition type required in the ‘Posting Type’ drop-down list.
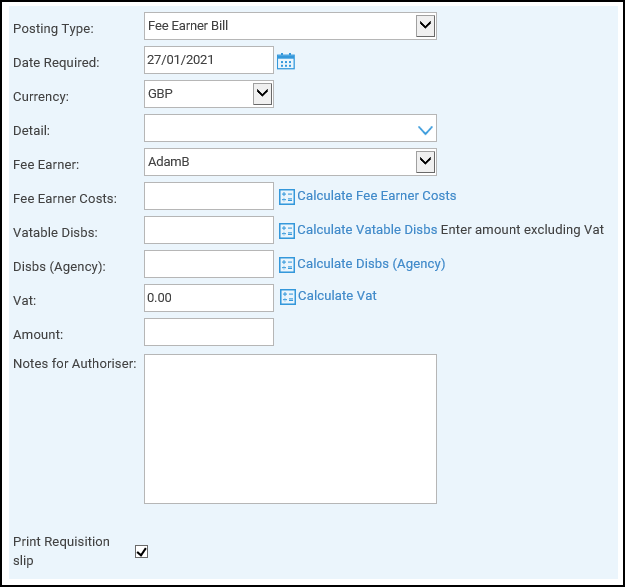
Now fill in the relevant details.
- Notes for Authoriser: Enter any notes for the requisition authoriser here.
- Print Requisition slip: If this box is ticked, on Saving the requisition, you will receive a print with 2 copies of the requisition, one for yourself and one for the accounts department. A copy is also saved to Matter History.
Click ‘Save’ when done. The authoriser will now be able to access your requisition. The Client Ledger will also reflect any pending requisitions along with the projected balances once these are posted.

Posting the Requisitions to the Client Ledger
The accounts staff can now authorise and post, or reject, any requested items.
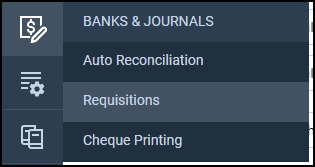
Navigate to Banks & Journals > Requisitions
There are three drop-down lists on this page. To see client ledger requisitions, select ‘Client’ from the ‘Select Ledger’ box.
Select a branch if required, or leave as ‘All’ to see all branches.
If required, you can select to just see one particular type of requisition, e.g. all your Bill requests, or all Client Receipt requests. Leave on ‘All’ to see all requisitions made and not yet authorised.
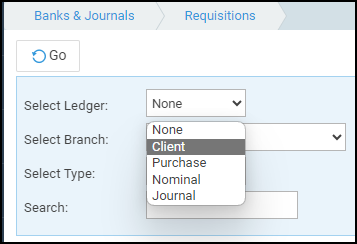
Click ‘Go’ when done to show the selected requisitions.

Clicking ‘Authorise’ alongside any of the requisitions shown will enable the accounts staff to authorise, but not post, reject, or immediately post the item to finalise the request.
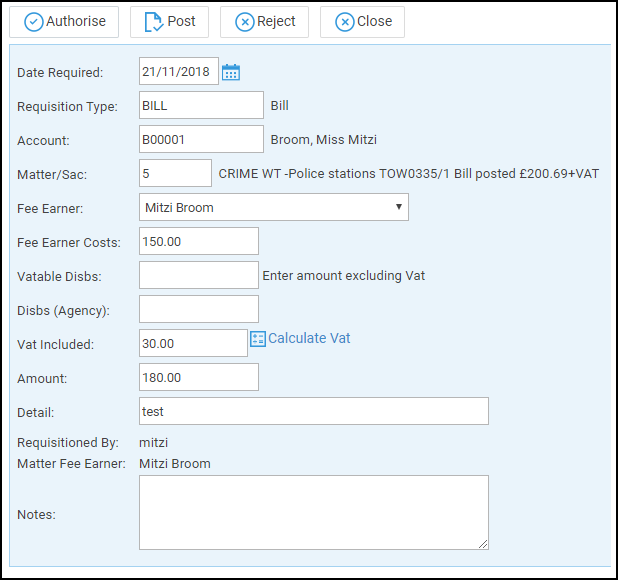
- ‘Authorise’ leaves the requisition authorised but not yet posted.
- ‘Post’ opens the standard posting screen for the accounts staff to complete the posting.
- ‘Reject’ removes the requisition from the list.
- ‘Close’ returns the user to the list of outstanding requisitions.
If the user has entered any notes when entering the requisition, they will be shown in the large ‘Notes’ panel at the bottom of the details area.
If the accounts staff choose to reject the requisition for any reason, they may enter notes as to the reason for this in the box highlighted below.

On subsequently clicking ‘Reject’, the requisitioner will receive an email informing them that their requisition has been rejected.