Run a Year End
Updated Dec 6th, 2023
Who is this guide for?
Accounts Supervisors
This guide will assist you with running your accounting Year End.
Check or Change your Year End date
Step 1
To check the current period set, or make any changes, navigate to the ‘Supervisor’ tab and select ‘Financial Periods’. Now on the right-hand side of the screen select ‘Edit Current Period Set’.

Step 2
This will now show the list of 13 available month end dates and, at the top, the year start date. The ticks represent your VAT quarter ends, and determine whether Osprey will produce a VAT form report.
Should you need to change your year end, highlight and delete and period end dates after your new year end date.
In the example below, if our new year end is changed to 30th April, we would delete periods 7 to 12. Similarly, it is possible to extend the year one extra month to period 13. If more than this is required, you should run a normal 12 month year and then a short year following.
The limit of 13 months is due to the reports for period end fitting on the pages. To extend the year into period 13 just enter the new month end date in the period 13 box. In the example below, we would enter 30/11/2017.
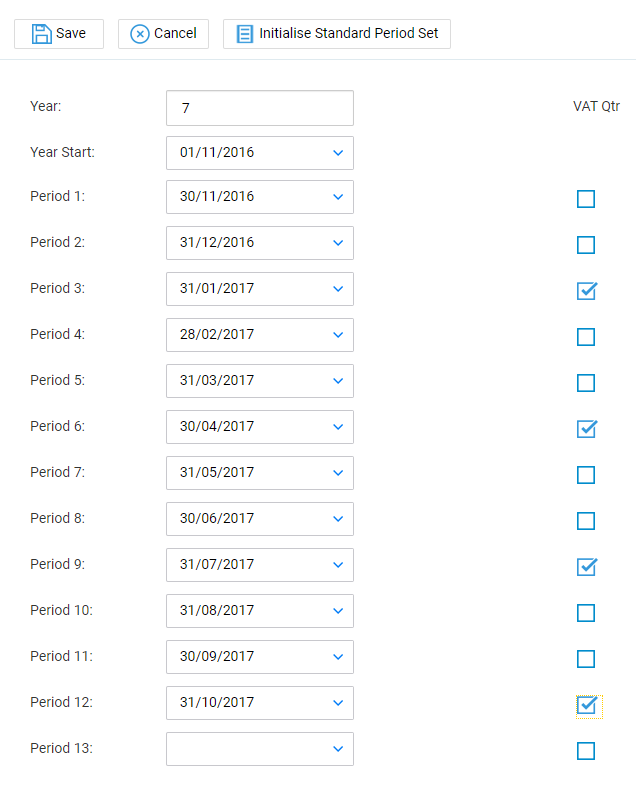
Before selecting ‘Save’, ensure the ticks on the right hand side are against the correct VAT quarter end dates, and amend as necessary.
Add Next Year’s Period Set
If your final period checks have been run but there is no close period button or close year button, accompanied by a message stating Next year periods have not been set up, this means that your next year dates have not yet been added.

Click Add Period Set.
Ensure that the Year Start is correct for your new year, and then click the Initialise Standard Period Set button. Check the dates are correct, and that your VAT quarter ticks are in the correct periods, and then click Save:
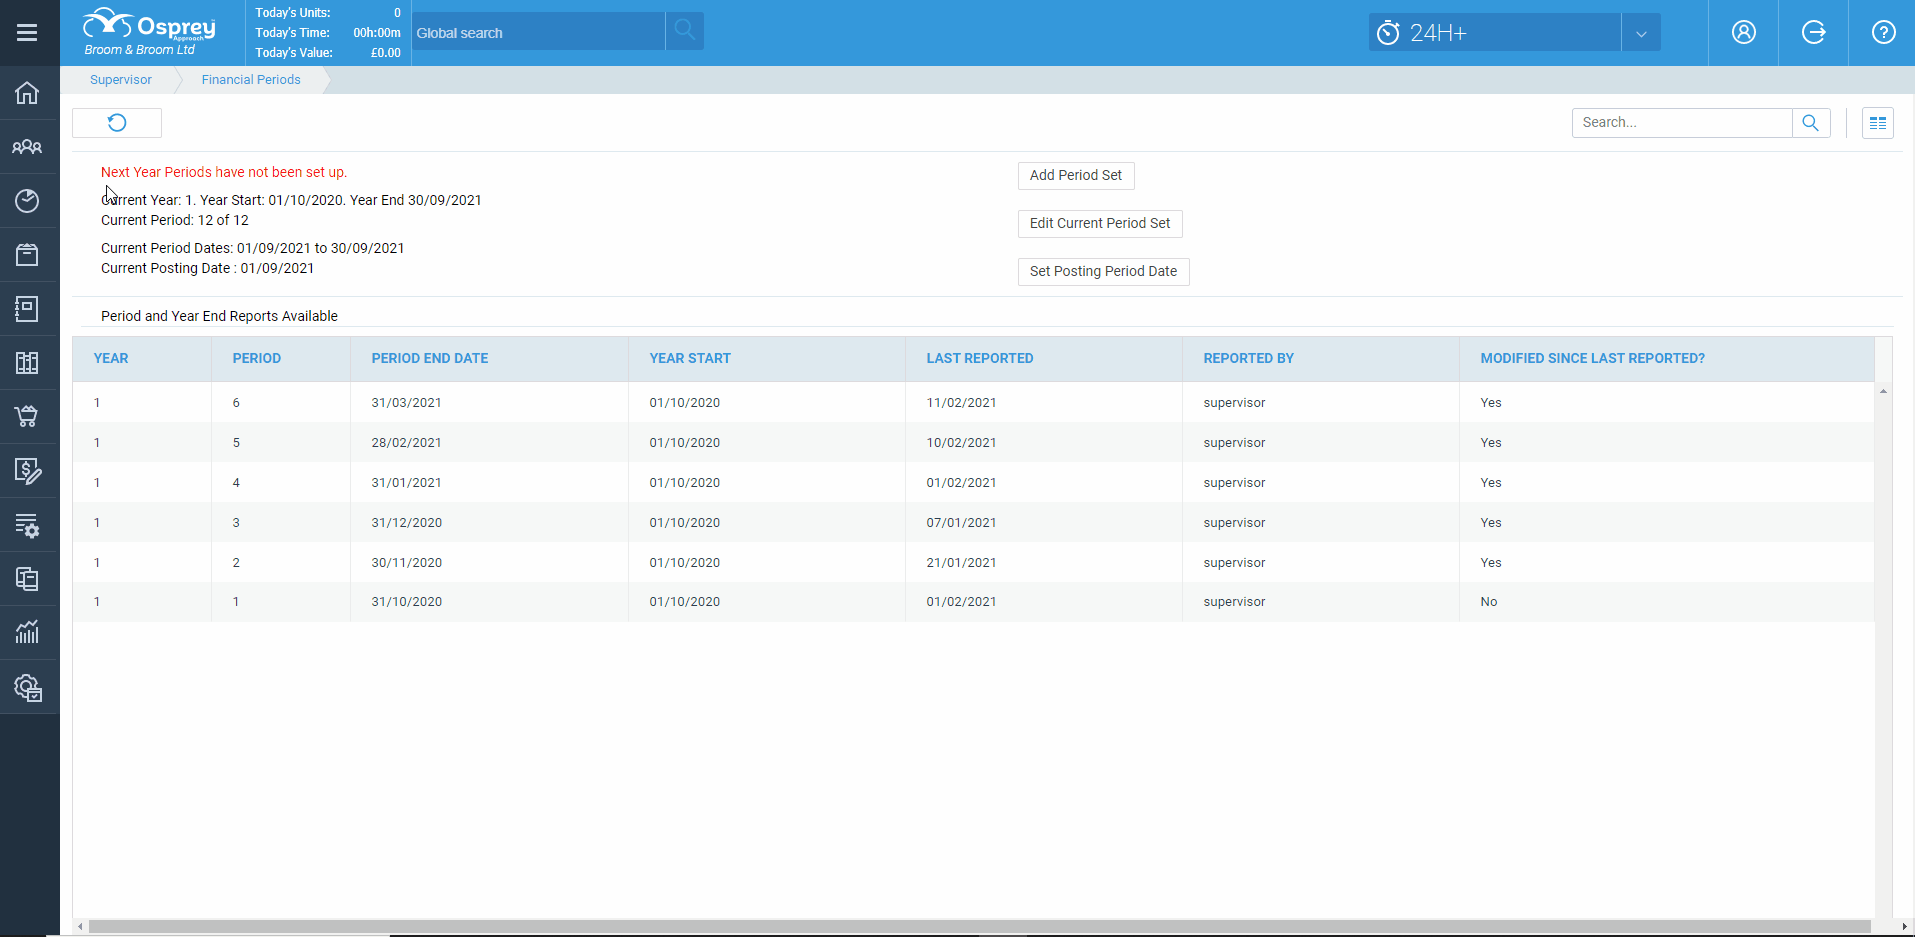
The Year End button should now appear. If any other red messages appear, click the headings below to resolve.
E.g.
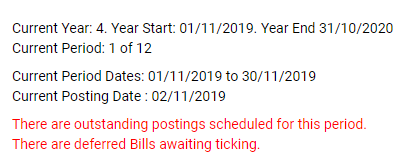
There are outstanding postings scheduled for this period.
There are deferred Bills awaiting ticking.
Post Outstanding Scheduled Postings
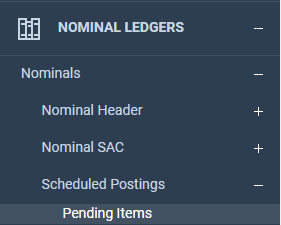
If there are outstanding postings scheduled for this period, select ‘Nominal Ledgers’ from the left hand menu. Select ‘Nominals’, and then ‘Scheduled Postings’ followed by ‘Pending items’.
Any scheduled postings that are still pending will be displayed. Select ‘To Period End’ from the ‘show postings’ drop-down list. If the postings listed are no longer applicable, select the ‘Delete’ option at the end of each item.
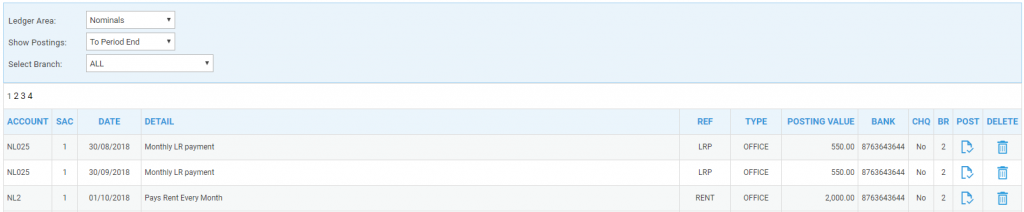
Select ‘Post’ against each relevant posting and then complete the post screen as required, clicking the ‘Post’ icon once finished.
Tick deferred bills
If there are deferred bills awaiting ticking select ‘Time Recording’ from the left hand menu, followed by ‘Tick Billed Time’.

A list of bills awaiting time ticking will be displayed.
Select the ‘Tick’ icon against each item to be processed. If no time is recorded for that matter, select the ‘Remove’ icon. When the allocate WIP to bill screen is displayed select the method most appropriate to allocate the time recorded to the bill.

- Manual enables the individual items to be selected.
- By date ticks all items up to a certain date.
- To value ticks all items in date order up to but not exceeding a value.
- By fee earner ticks all items for a specified fee earner.
- By rem type ticks all items for a specified remuneration type.
- All ticks all.
- Defer ticking returns to the ‘Tick Billed Time’ menu with no changes.
- Deselect all deselects all items ticked in this session.
Run Period End and Year End
The final period and the Year End are run together with just one button; there is no facility to run the final period end without running the year end.
Step 1
After completing all the pre month end checks and setting up the periods for the next year, select the Supervisor area and then Financial Periods.
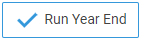
The ‘Run Year End’ button is displayed. After selecting it, you will be asked to confirm you wish to proceed. Once confirmed, the running of the year end is complete and the system is now in the next financial year.
Step 2
The bottom of the screen will display all of your previously run month end and year end reports.
On the relevant report right click and press the “run” button.
Step 3
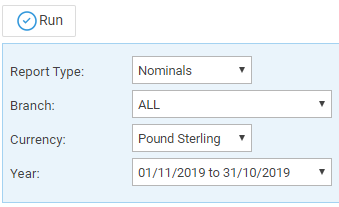
In ‘Year End Reports’ the following options exist. Firstly ensure the correct year is selected. If the Purchase ledger is not in use, remove the tick.
As with the period end reports, use the Toggle Selection to remove ticks or put ticks in all the available boxes.
Step 4
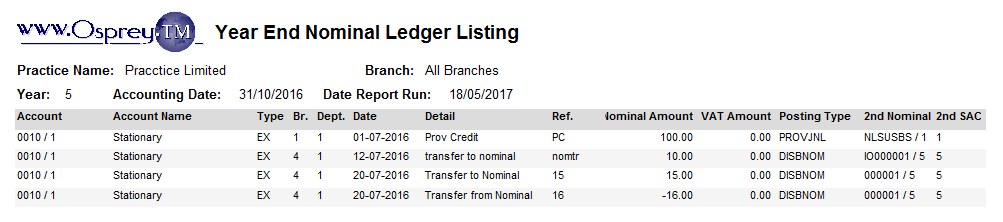
Once the required reports are selected choose the print option from the top left. The reports viewer screen is now brought to the front of the screen showing the first selected report.
Print this screen using the Print button and then use the forward arrows button (move to next report) to proceed to the next selected report.
It is not necessary to print the year end before allowing users to continue posting in the new year. The year end can be printed at any time by coming back to the supervisor area and selecting Financial Periods.
Find the line with ‘END’ in the period and select ‘Run Report’, or navigate to Reports, Financial Management, Year end.