Enable Matter Restrictions
Updated Dec 20th, 2023
Who is this guide for?
Accounts Supervisors, Case Management Supervisors and System Supervisors
Osprey allows you to lock access to matters for certain staff members only, to ensure that your client data is kept secure and confidential. There are two options.
- Set permissions for all matters automatically – When you use this option, only the matter fee earner, supervising fee earner, and users set as supervisors can access matters.
- Set permissions manually per matter for users or security groups – This option enables you to lock down individual matters manually so that only certain users or security groups of users can access them.
Set permissions for all matters automatically
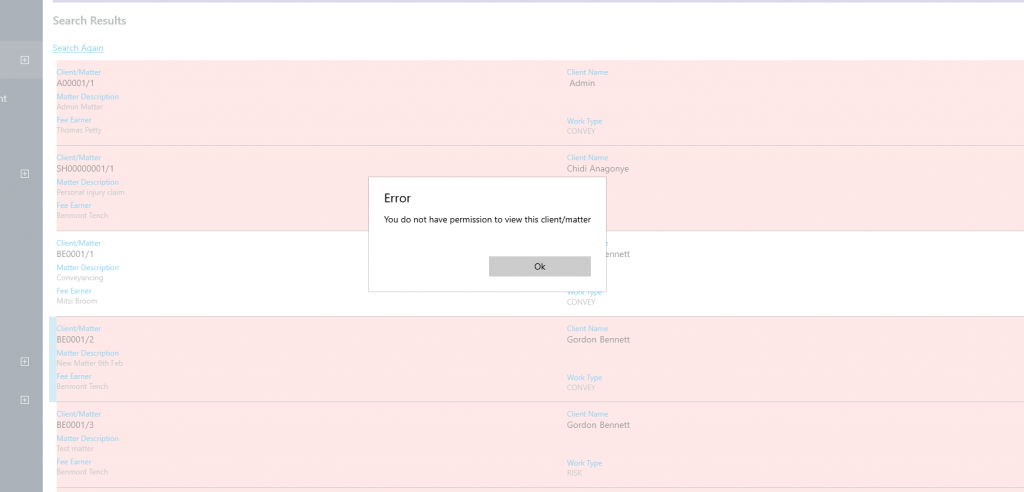
Use this option if you want all matters to only be accessible by the Matter Fee Earner, Supervising Fee earner, and users set up as Supervisors.
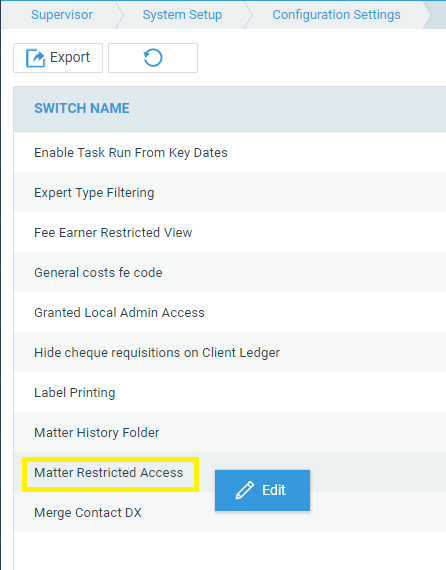
From the Supervisor menu in the browser, select System Setup > Configuration Settings. Search for “matter” in the top right of the screen, and right click Matter Restricted Access. Select Edit.
Ensure that the switch is set to True and click Save:
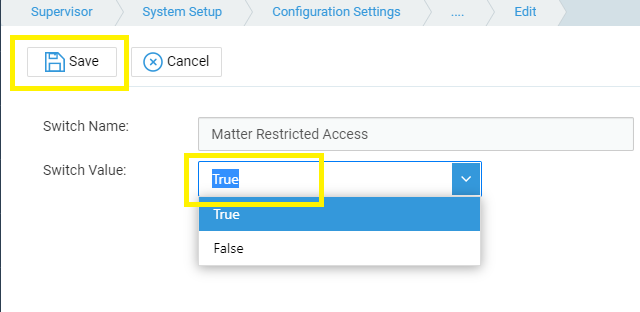
Now, only the Matter and Supervising Fee Earners will be able to access each matter, along with Supervisor users:
Manually set permissions on individual matters
To protect sensitive matters, if a matter has previously been restricted, any new users that have been added will automatically be restricted access.
Any matters that have been restricted will be visible within the Restricted Matters report (see below).
Use this option if you want to manually set permissions on each matter or just a few matters for Users or Security Groups (for more assistance on setting up Security groups click here). Any matters that you have not set permissions on will be accessible to everyone. Ensure that the Matter Restricted Access switch in Supervisor > System Setup > Configuration Settings is set to False to enable individual matters to be set.
Navigate to the Clients and Matters area (this can be done in the browser or the Case Management App).
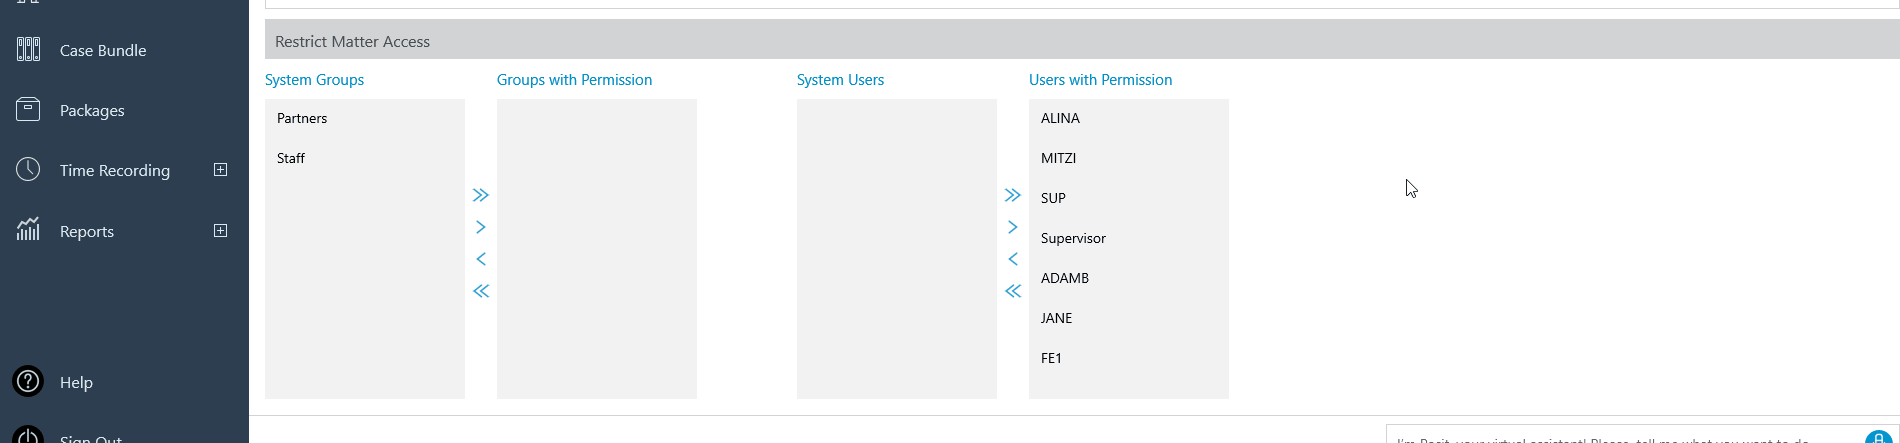
Locate and Edit the matter you wish to restrict access to. Scroll down to the bottom of the Edit Matter page. You will see the groups and users on the system in the System Groups and System Users columns. At this stage, ALL groups and users are restricted from the matter. To enable permission, use the chevron to move groups or users to the Groups with Permission or Users with Permission lists, as shown in the video below.
To quickly move all groups/users to the Permission side, use the double chevron button. You can then move the required groups/users for restriction back into the System side using the single chevron.
Save your changes. These users/groups will now be unable to access the matter.
Viewing and Auditing Matter Permissions
There are two reports available in the browser version that you can use to see the matters which have permissions assigned to them. These may need to be enabled in your access template – for more information on editing access templates, click here.
To see a full audit of users who have had their access removed from each matter, select the Reports menu > Miscellaneous > Matter Restriction Audit. This shows each user added or removed from each matter, the date the restriction was added/lifted, and by whom.

To see a list of all matters which have been restricted, along with a list of users who have access, select Reports > Miscellaneous > Restricted Matters.
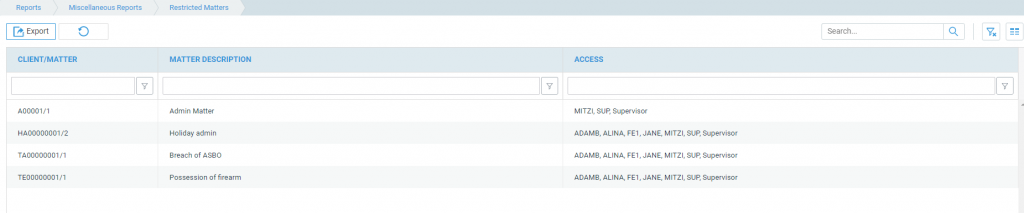
Both reports can be filtered using the filter row, and exported to Excel/CSV if required.