Install and use the Osprey COM add-in for Microsoft Office
Updated Mar 21st, 2024
Who is this guide for?
Any Users
The Osprey Office Connector allows you to set up interactivity between Microsoft Word, Microsoft Excel and Osprey. This guide will take you through installing and using the add-in.
Install the Add In
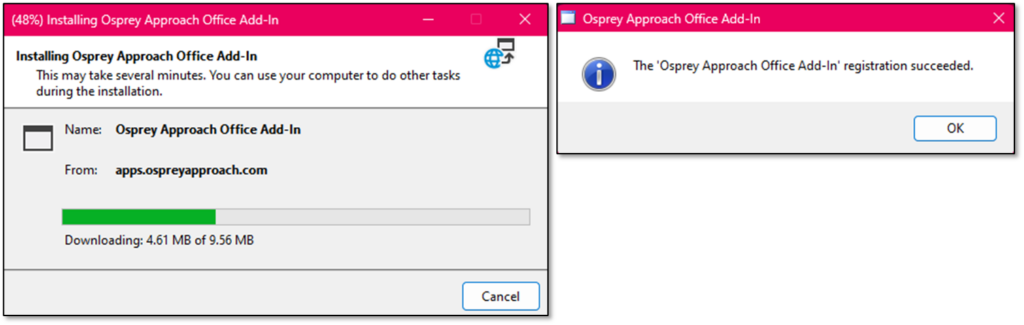
First you will need to install the Office add-in. Close ALL active programs currently running on your machine before proceeding.
Click here to begin downloading the add-in.

Click ‘Install’ and a progress bar will appear showing the progress of the install. Select ‘OK’ once the installation has completed to finalise the registration.
Using the Word Add In
Step 1
Once installed, open Microsoft Word and you will see an additional menu item in the word toolbar as shown below.

Before using the Add-In, you must firstly apply the relevant settings. You are required to enter your URL and your username and password. If you do not enter the correct settings, you will be unable to use the application.
Click on the ‘Osprey Approach’ tab and then select ‘Settings’.

Step 2
Enter your URL into the ‘Site URL’ box. Please remember to include the https:// prefix to your URL, so it should display as below.
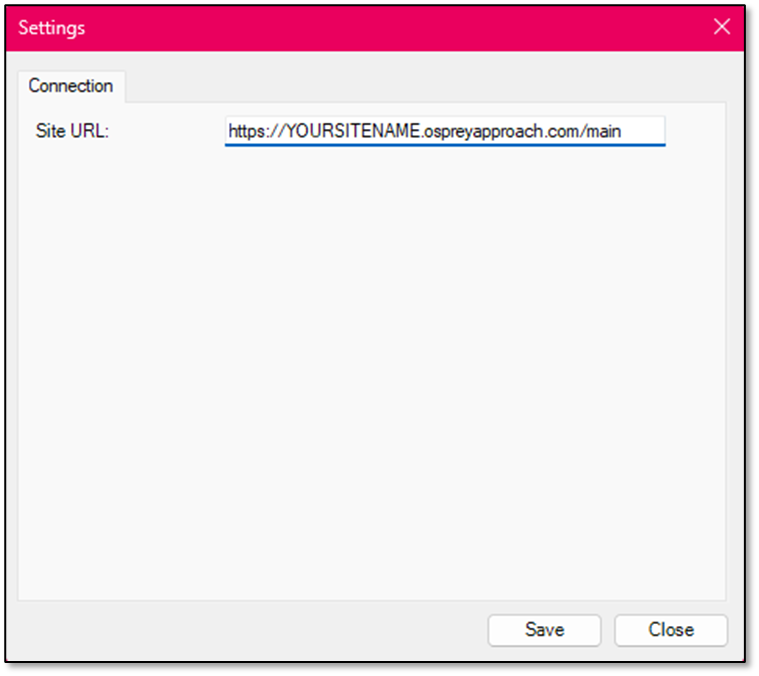
Now click ‘Save’ to keep your settings.
Step 3
Now select the option to ‘Login’ on the OspreyTM tab. Enter your username and password, then click ‘Login’.
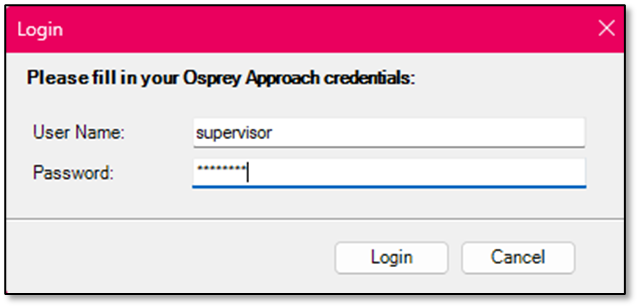
All icons on the OspreyTM tab should now be available.

Step 4
Once logged in, the ‘Login’ icon will have changed to display an option to ‘Logout’, as shown above. Click this to log out of the Word add-in.
From within Microsoft Word, the Office Add-In will allow you to:
- Select and open any existing Osprey Word Templates from a client’s file and then edit and save to a their Osprey matter history.
- Create a new word document and add it to the matter history of a specified Client.
- View and amend matter history documents
- Run and load workflows.
There is no need to have the Osprey application open; you just need to ensure you are logged in through Word.
Running Standard Documents
First we will look at opening an Osprey document from your standard documents area through the add-in.
Step 1
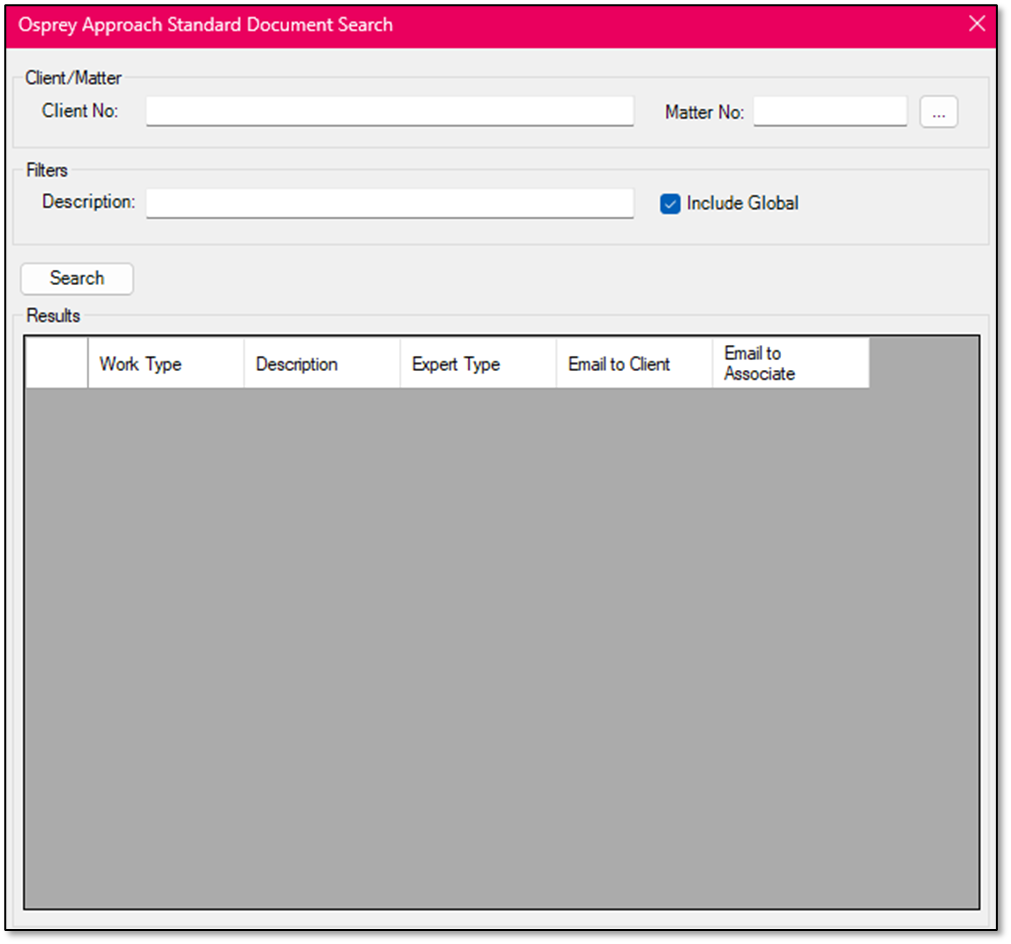
Click ‘Run Standard Document’ to open up the ‘Client Search’ box, as displayed:
Step 2
To search for a client’s file, enter in the Client and Matter numbers where specified and then select ‘Search’ to return a list of available templates. If the client reference is unknown, select the advanced search box next to the ‘Matter No’ Box to bring up the below panel.
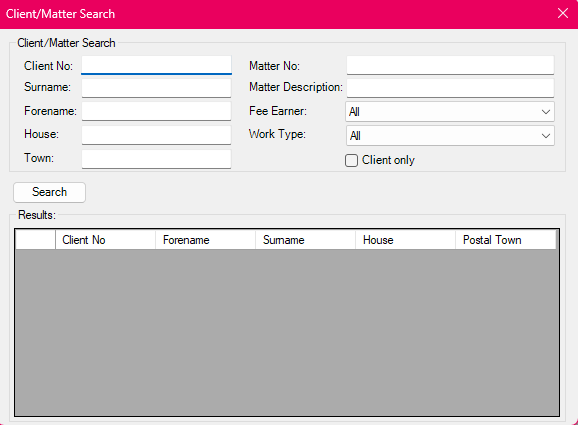
Enter the relevant details and then click ‘Search’ to return a list of the search results. Right click on the relevant search result and then click ‘Select’, this will return you to the initial screen but the client reference and matter number will now be displayed.
Step 3
Click the ‘Search’ button and this will list all available document templates for the selected matter.
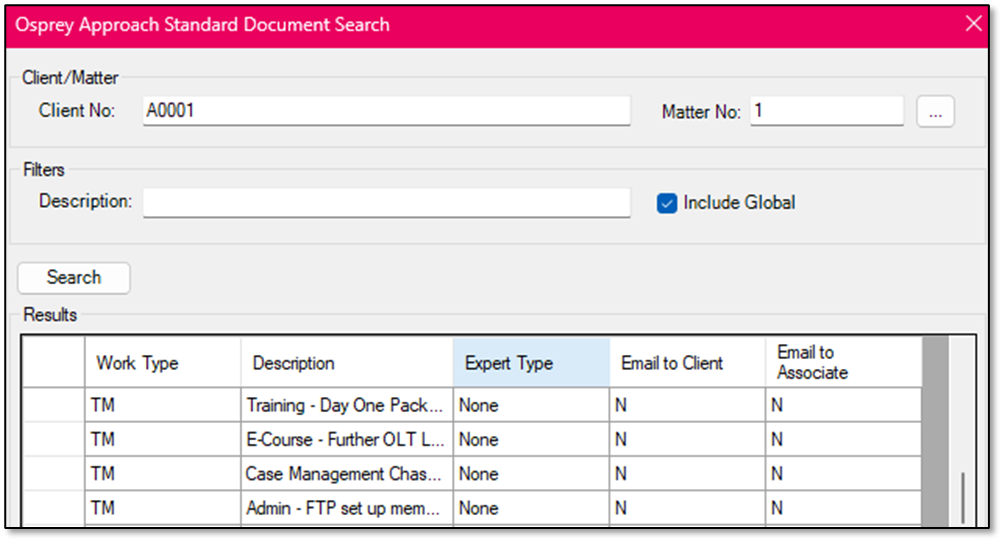
To select a document, right click on the required document in the available list and then select the option to ‘Run’ which should then appear.

The document will now open in Microsoft Word.
Step 4
To save your documents in a client’s matter history, Click the ‘Save’ button on the Osprey Approach bar. You can now search for a client and matter to save the document on. Right click and select. The save window will then appear.
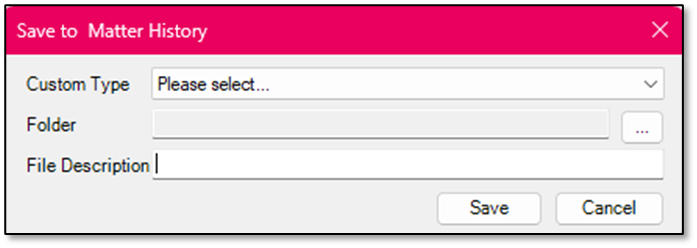
Enter a description and then click ‘Save’.
Now if you log into Osprey and view the matter history of that client, you will notice your document has now been saved.
Saving Document to the Matter History
You are also able to create and save a new document from a blank word template.
Open a word document in the normal way. Once you have finished work on it, select the ‘Save’ option on the Osprey Approach tab. You can then follow the above process to save your new document to the matter history
Opening Documents Saved in the Matter History
Step 1
You are also able to open a document from a selected client’s matter history by clicking the ‘Edit Matter History’ icon.
This will open up the client search screen. Enter the client reference and matter number if known, or use the advanced client search.
This search screen also offers various filters to refine the search results.
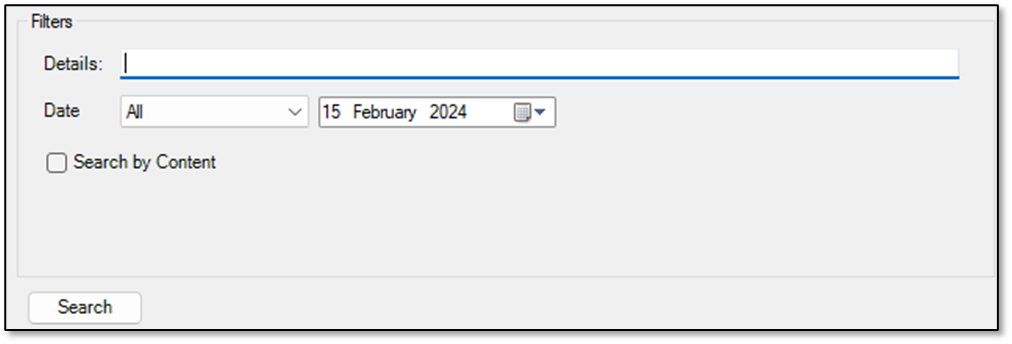
Details: Enter in the exact document description to return any matches.
Date: Allows you to search history entries by a specific date or date range.
Step 2
Click the ‘search’ button to bring through your results. Depending on the filter options used. You will see a list of matter history documents for the selected client and matter.
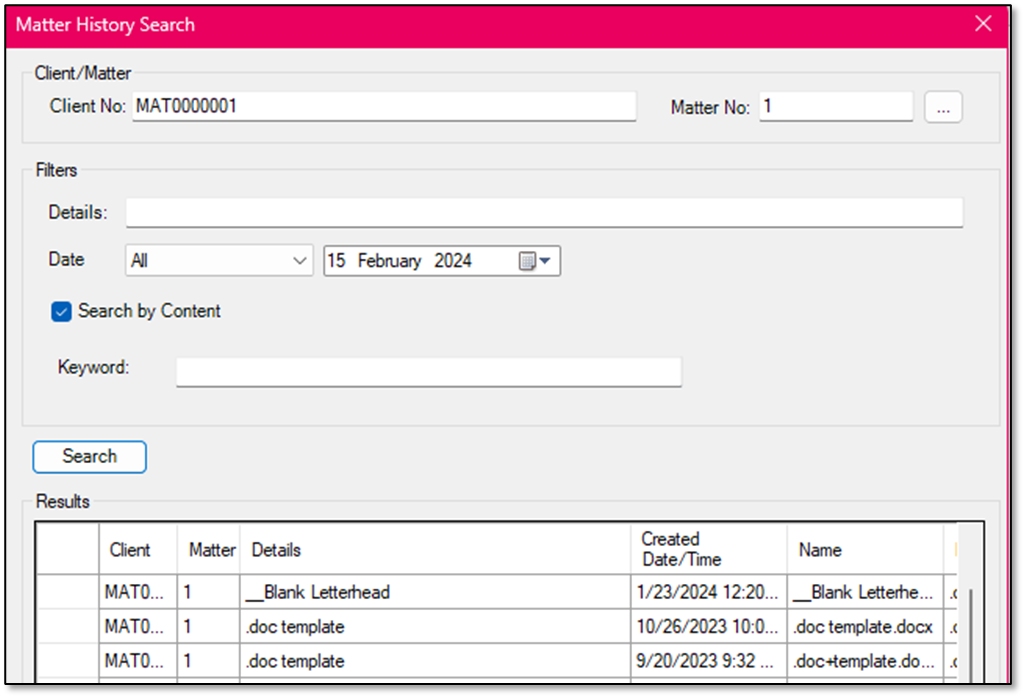
To open a document, right click it and click ‘Select’. The document will now open.
Step 3
If you have made changes to a document opened using the ‘Edit Matter History’ button, click ‘Save’ and a panel will appear displaying the original document title.
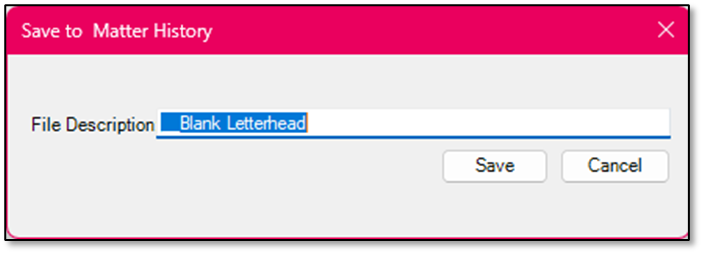
Either accept and save, or, if you wish to create a new document, rename and save. Your document will have now have saved into the client’s matter history.
Workflows
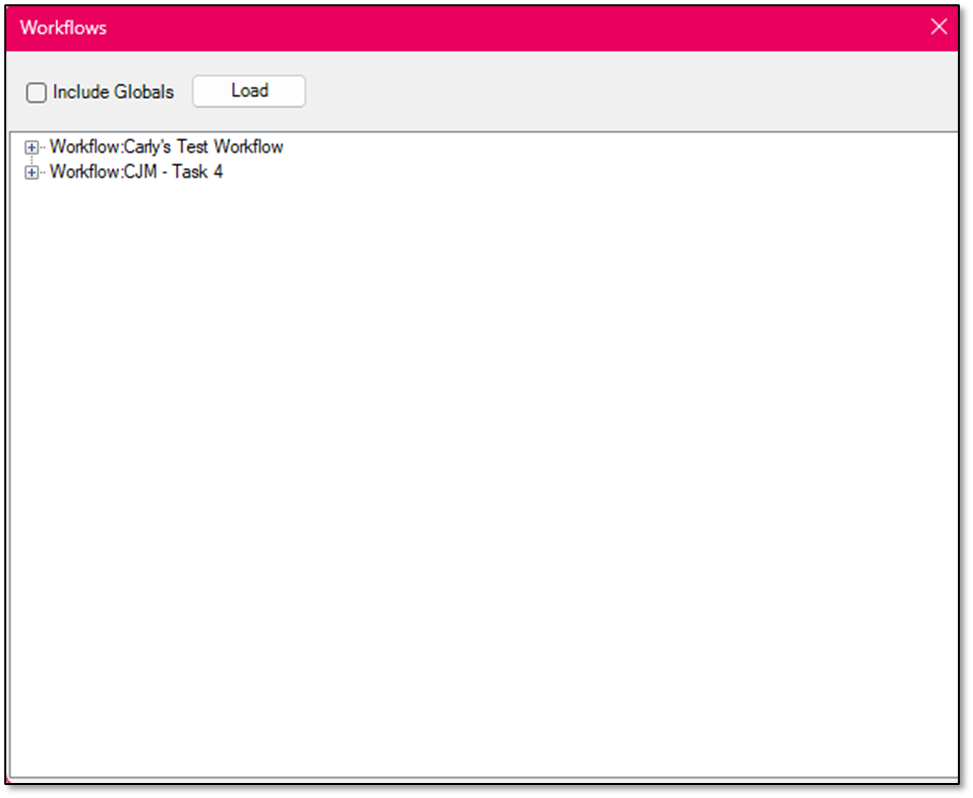
Step 1
To load a Workflow, select the ‘Workflows’ icon under the Osprey Approach tab. The client search panel will open.
Step 2
Either enter in the client reference and matter number if known, or use the advanced client search as explained earlier in this document
Step 3
If you wish to load a client level workflow, ensure that you check the ‘Client level Workflows’ box, otherwise, select ‘Load’ to open a list of available workflows.
Step 4
Right click a task to reveal a ‘Run’ button. (If you wish to view the content of a task prior to running it, click on the ‘plus’ sign to expand the content).
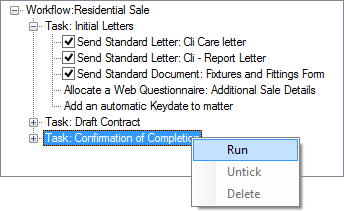
Step 5
Click ‘Run’. The system will then work through all of the attached actions in turn. A screen will appear showing details of the action currently being performed.
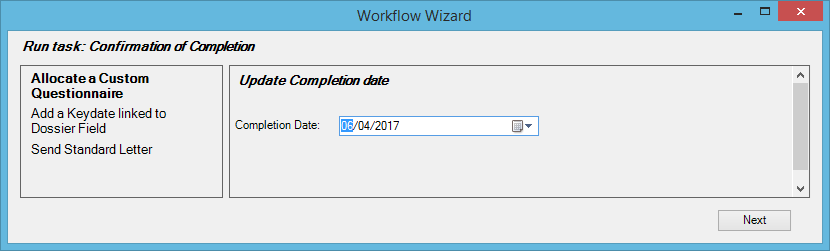
Click ‘Next’ after each action has run until the task has been completed
Step 6
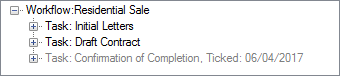
You will then be returned to the workflow screen and any tasks that have been run will now be greyed out. (If you run any letters through an action, save through the Word Add-In in the same way as previously explained. Once saved, you will be returned to the next workflow action)
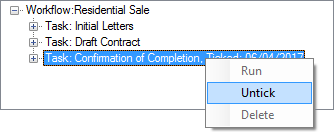
To untick a task, right click on a greyed out task and select the ‘Untick’ option to re-set it and make the task available to re-run.
Step 7
If a workflow has been set as ‘customise at matter level allowed’, you can delete a task from within a workflow. Right click a task name and select the ‘Delete’ option. A warning will appear asking you to confirm the deletion of the task.
Click ‘OK’ to continue, or ‘Cancel’ to return to the workflow.
Step 8
To restore a previously deleted task, click the ‘Workflow Status’ button.

The screen will show, in order, the last time a workflow was amended. Click the remove option and the deleted stage will be re-instated.
Click ‘Load at Position’ if you wish to load a workflow into an existing workflow (this is dependent on the workflow being set as ‘Customise at matter level allowed).
The top part of the screen displays any currently loaded workflows; the bottom part of the screen displays workflows that can be loaded into the existing one.
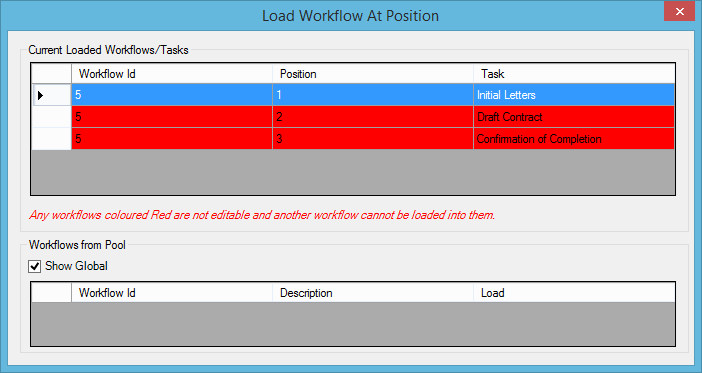
Highlight the workflow you wish to load and then click Load. You may now select the position you wish the workflow to appear in. Click ‘OK’ to load the workflow.
You are also able to remove a workflow using the add-in. Within the workflow screen, right click on the relevant workflow and select ‘Remove’.
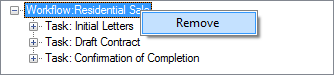
Click ‘OK’ when prompted to confirm deletion and remove the selected workflow.
Using the Excel add in
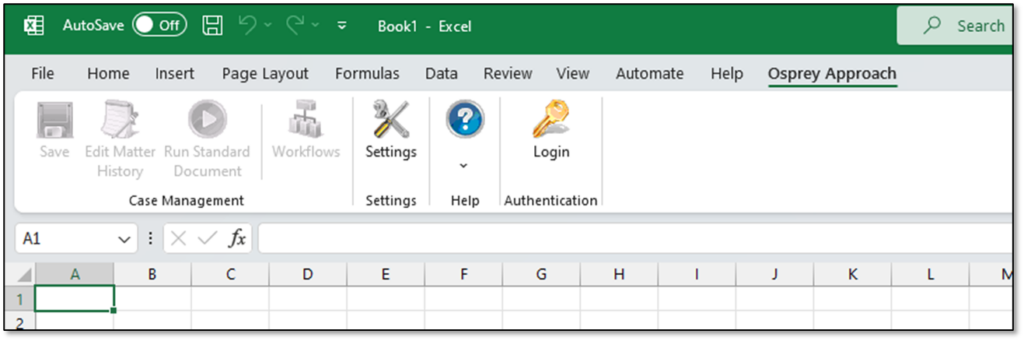
Once you have installed the Office add in, you will notice an additional menu in Excel:
Click the Settings button. You will need to enter your Osprey URL here:
Once you have entered and saved the URL, click the Login button on the Osprey Approach menu and log in with your Osprey credentials.
You will now be able to save Excel documents directly to clients and matters. This functions in the same was as saving documents from Word.