Create Web Portal Enquiries & Questionnaires
Updated Apr 16th, 2024
Who is this guide for?
Case Management Supervisors and System Supervisors
You can set up custom questionnaires that allow you to view and amend a selection of matter dossier fields.
This guide will focus on two types of questionnaires, which will allow your clients to provide you data to review and submit directly into Osprey.
Both these forms are designed to work with our Osprey Web Portal.
New Enquiry Questionnaires can be used to allow new clients to be able to raise new matters from your Web Portal log-in page, whilst Workflow Web Questionnaires can be sent out to your existing clients as part of a workflow.
Creating a New View/Questionnaire
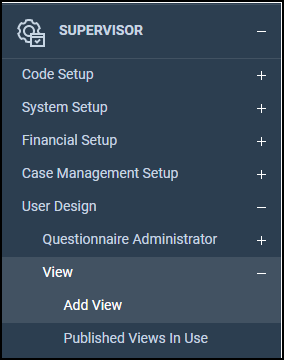
Navigate to Supervisor > User Design > View > Add View.
Osprey will direct you to a screen to enter a Description and Published Description.
The Published Description will be what the clients see, whilst the Description will be for internal users.
Select the relevant Work Type and View Type.
The Work Type dropdown will allow you to specify which area of law the questionnaire is for. You will have access to the dossier pages associated with this work type.
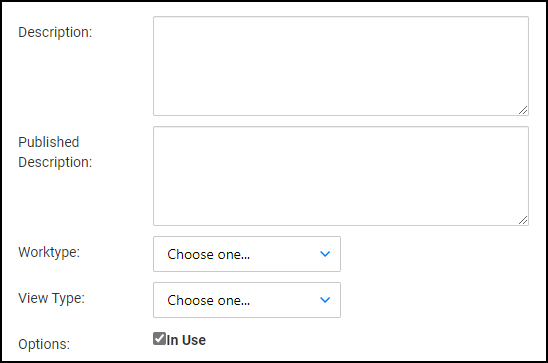
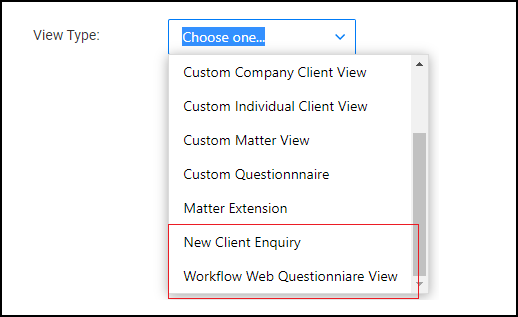
The View Type option will show you a list of views available to create. Select either the New Client Enquiry, or Workflow Web Questionnaire View.
Fill in the details as appropriate and select Save.
You will then be taken to the Views screen.
The Views screen
This screen can be accessed from Supervisor > User Design > View.
At the top of the screen will be a filter options, allowing you to show a specific View Type.
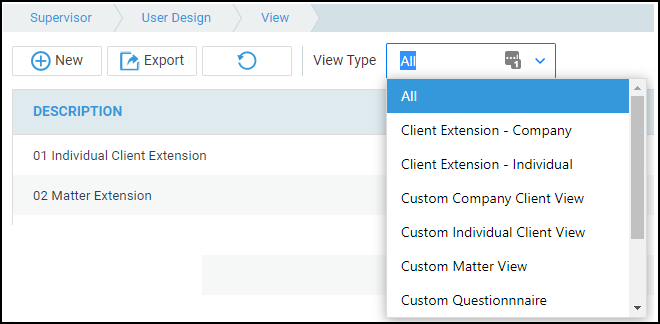
Choose either New Client Enquiry or Workflow Web Questionnaire from this list to view all available questionnaires.
Amending a View
When you right click a Questionnaire, you will a few options available:
- Edit: will allow you to change the Description and Published Description. You will not be able to change the View Type or Work Type.
- Delete: will allow you to delete the custom questionnaire created.
- Clone: will allow you to clone the questionnaire.
You can clone views/questionnaires across work types, however if any dossier fields are not available on the destination work type, these will not be cloned. - Link: will allow you to link dossier fields to your questionnaire.
Linking fields
Right-click on your View and select Link.
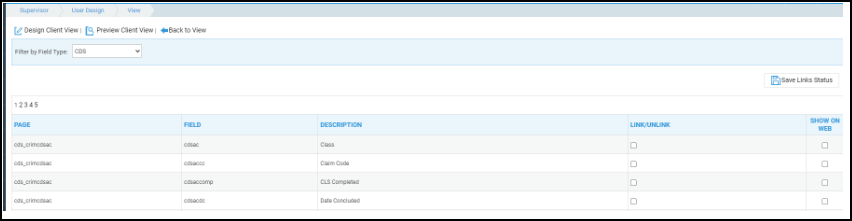
You will be shown the option to Filter by Field Type at the top of the screen.
- DCS: shows all fields available as standard under the criminal and civil billing.
- Client: shows all fields available for Client or Matter information.
- Dossier: allows users to filter down all dossier pages linked to the work type assigned to the view, and then the corresponding dossier fields.
- Notes: option shows you any Standard Text Notes which have been set up from within Supervisor > Code Setup > Standard Text Descriptions.
These are text only notes, allowing further descriptions or dividers between groupings of fields.
In order to link any fields to your View/Questionnaire, place a tick under the Link/Unlink column of the relevant field, and click Save Link Status.
To remove, untick the relevant field, and click Save Link Status.
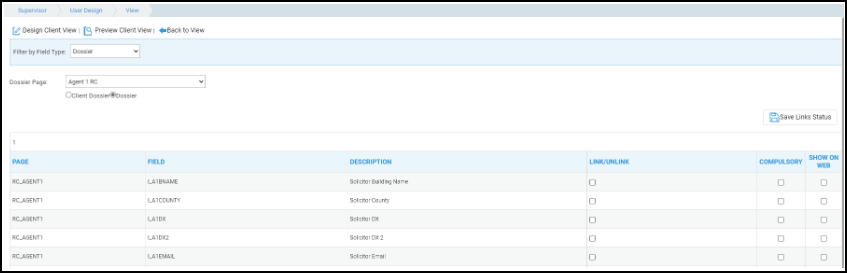
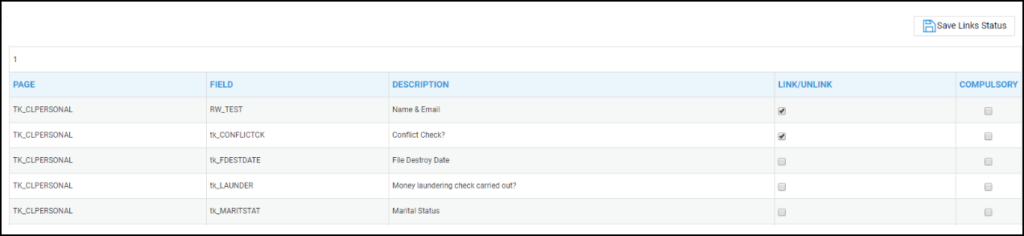
You may also make any fields compulsory if you wish.
Compulsory fields are fields that cannot be left blank. Due to this, the compulsory option will not function when using list fields, or fields which have a default option (such as a default date).
Show On Web will make the field visible to the client. Unticking this will hide from the client but be visible to the user when reviewing the field.
As all matters require a fee earner, branch, department and a surname, these fields are linked by default. However, you may wish to untick the Show on Web options for Fee Earners, as the client may not know which fee earner the matter will be assigned to.
When approving a New Web Enquiry, a Questionnaire Administrator can allocate a fee earner internally at the point of converting to an Osprey client.
Select Save Links Status once finished.
Designing the View
Once all fields are linked, you can reorder any linked fields using the Design Client View, located at the top left of the screen.
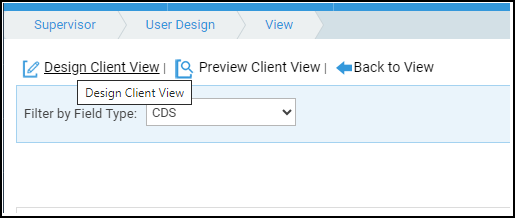
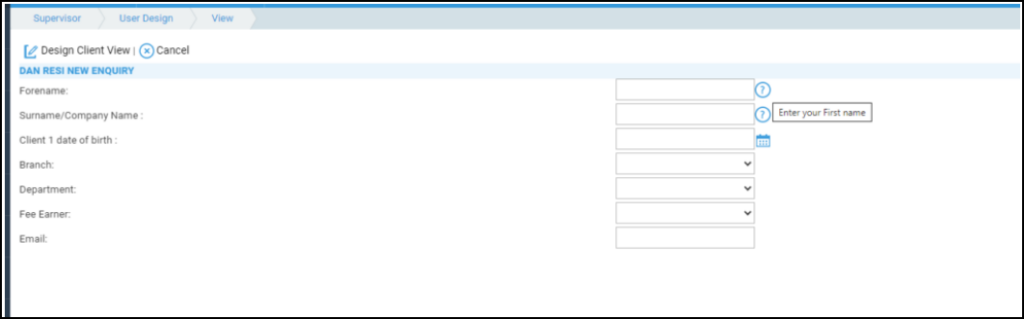
This will take you to the Design page, allowing you to reorder your fields, and add help text to prompt your client what data is required, and in what format.
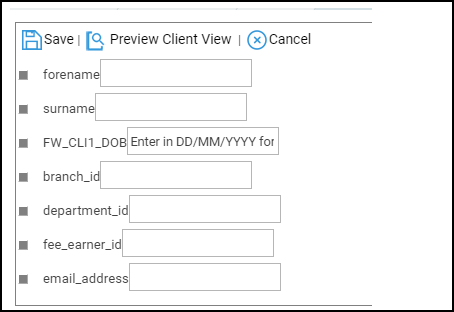
To reorder, click and drag the grey handle icon, allowing you to reposition the field.
Enter any help text into the text box if required. This will appear as a help icon for the client.
Click Save to keep your changes.
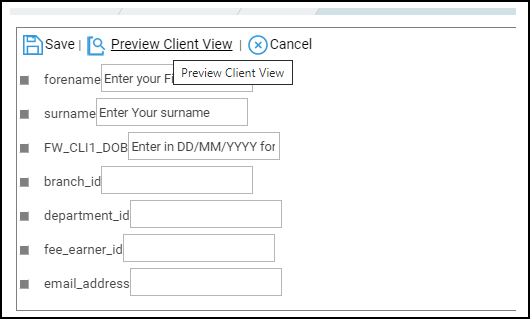
Preview View
You can preview any views with the Preview Client View option. This will allow you to preview the questionnaire’s order and help text.
New Client Enquiries will be visible under the New Enquiry option.

Workflow Web Questionnaires can be incorporated into workflows, allowing the client to sign into the Web Portal and complete any questionnaires that they have been sent.

Reviewing the received Enquiries and Questionnaires
Any New Enquires or Workflow Questionnaires can be reviewed via a Questionnaire Administrator. To set these up, please look at the related guide “Setting up Questionnaire Administrators”.
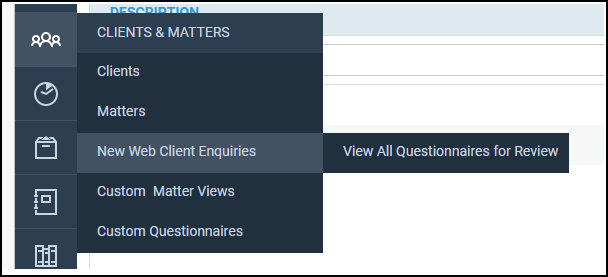
New Enquiries from the portal can be accessed from Clients & Matters > New Web Client Enquiries.
Workflow Web Questionnaires are accessible via Clients & Matters > New Web Client Enquiries > View All Questionnaires for Review.
You will be able to see any questionnaires ready for review. Click the View icon to all received questionnaires for the relevant questionnaire.

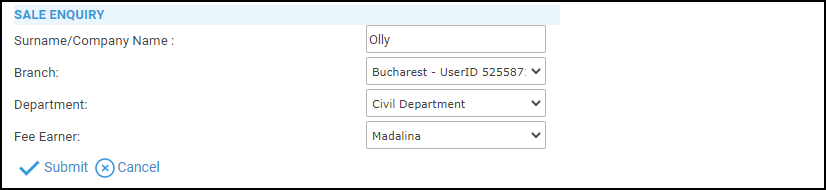
From here, you can delete any pending enquiries, or convert them to an Osprey matter.
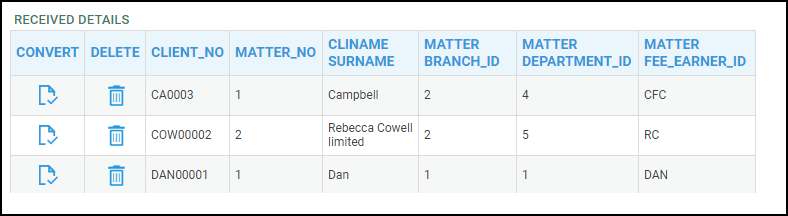
When clicking Convert, you will be able to review and amend any data received. Once done, click Submit to update the client’s file with the returned data.
Once deleted or converted, the questionnaire will disappear from the list of pending questionnaires.