Create Email Rules
Updated Jun 16th, 2020
Who is this guide for?
Microsoft Outlook Users
You can set rules within outlook that automatically assign emails to a specific folder.
Step 1
Open your local copy of Outlook and click on the ‘File’ tab in the top left.

Step 2
There will be a button in the main part of the screen which will be marked ‘Manage Rules & Alerts’.
Click on this to bring up your ‘Rules & Alerts’ panel.
Step 3
Step 4
Select the ‘New Rule’ button. This will open up the ‘Rules Wizard’ which will then allow you to select an appropriate rule.
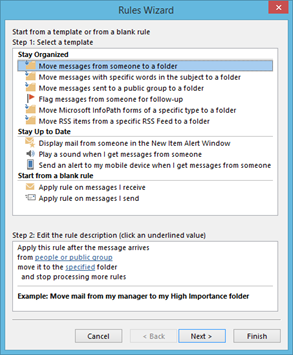
In this example, we will set up a rule to make sure that junk emails are sent to the junk folder. Ensure that the ‘Move Messages from Someone to a Folder’ is highlighted and select ‘Next’.
Step 5
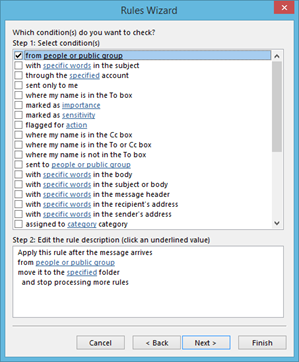
You may now choose the condition. Select an appropriate one, for example ‘From people or public group’, which will allow you to select a certain email address or group. You may choose more than one condition if you wish
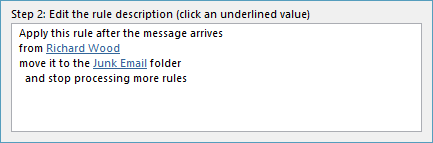
Once selected, under the ‘Step 2’ heading, you may click on the underlined blue text and add your details in here.
Select the ‘People or public group’ text to bring up your Outlook address book. Select the person or group that you wish to set the rule for and double left-click the mouse to add them. Select as many as you need, then click ‘OK’.
Select the ‘Specified’ text to allow you to choose a folder in which to store emails from the selected people or group.
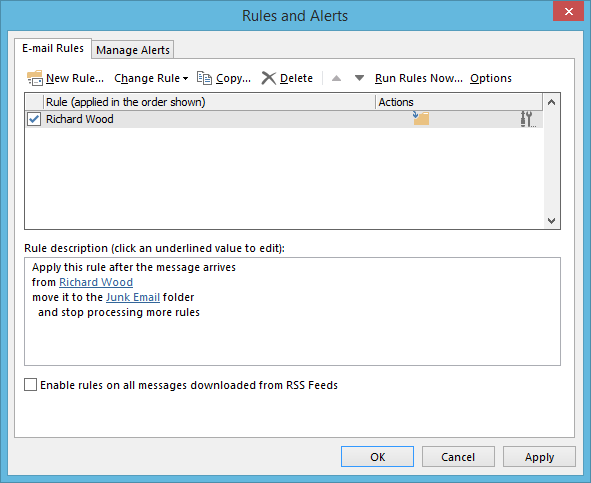
Once complete, the panel will look like this:
Step 6
Click ‘Next’ and you will be able to select some more actions if you wish. Select ‘Next’ again and you will now be asked to choose any exceptions. Again, you may select as many as you wish.
Step 7
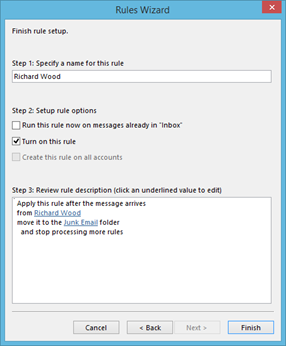
Select ‘Next’ and you will now be able to complete the rule setup. Choose an appropriate name and tick the ‘Run rule on messages already in Inbox’ box if you wish to apply this rule to historic emails.
Step 8
Click ‘Finish’ to complete the process.
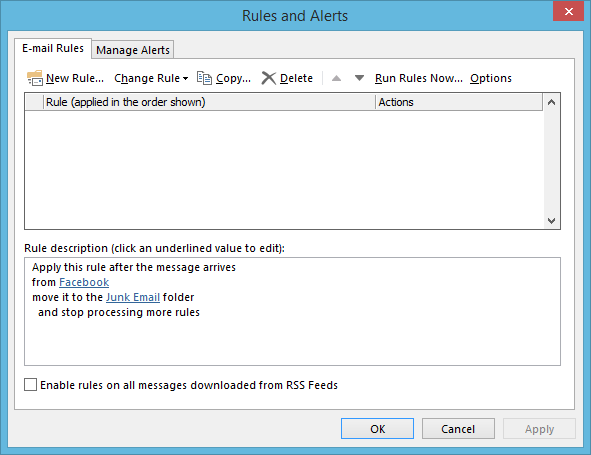
You will now be taken back to the ‘Rules & Alerts’ panel with your new rule visible in the list at the top of the box. From here you may change, copy or delete the rule should you wish.