Archive your Completed Client Matters
Updated Apr 15th, 2024
Who is this guide for?
Any Users and System Supervisors
Once a matter has been completed for a client, you can archive it. This should be done as part of your general housekeeping. Archiving can be done on a matter by matter basis or via the Batch Archive facility.
Archiving a single matter
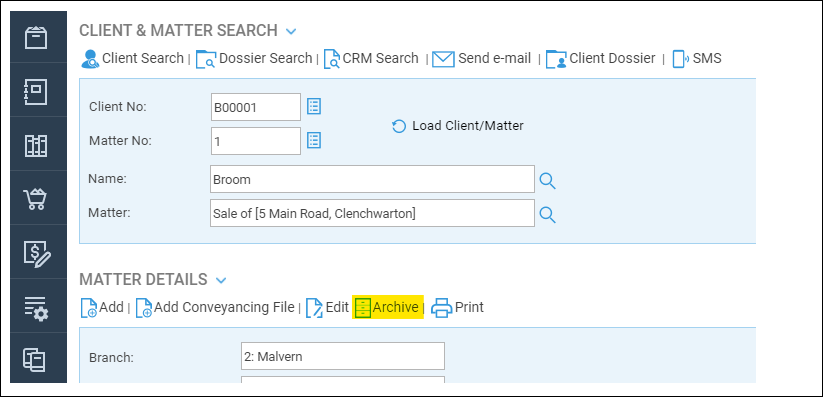
To archive one matter, simply navigate to the Clients and Matters menu in Osprey, and select the Archive button:
The following screen will appear:
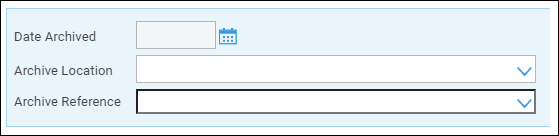
Enter the date at which you want to archive the matter (the matter will appear in that month’s period end reports but not in any subsequent months) and if available, enter the location and the reference for the paper files storage.
Matters may only be archived if they have no financial balances on them at all. If your matter still has a balance it will not allow you to archive, showing a message similar to the following:

To archive the matter, any balance must first be cleared from the Client Ledger.
You may also see this message:

This means that there is still time recording on the Time ledger, you can still archive the matter, and the time will be written off – it can be reinstated at a later date if required.
On the archive screen, Osprey will also warn you about any of the following prior to archiving a matter:
- Unpaid Disbursements – these are posted on the client ledger using the posting type u – Unpaid Disbursement. The list will contain any such postings which have been added, but not either paid or cancelled, so these should be attended to prior to archiving the matter.
- Unticked Bank Postings – any client or office transactions which have not been reconciled by ticking on the bank – this could mean for example that although you have sent the client the balance on account via a cheque, the client has not yet cashed that cheque, so it is worth chasing up prior to archiving the client.
- Unmet Key Dates – Key dates which have been added under Case Management, but not marked as having been completed.
- Suspended Time Entries – timed entries using the timer which have not been posted.
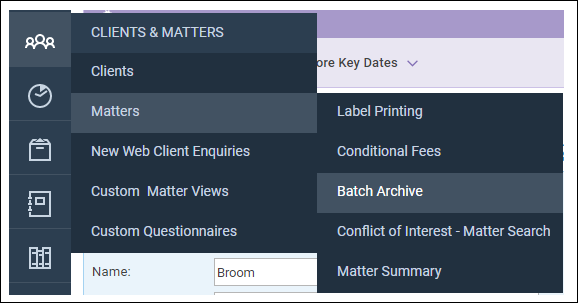
Using the Batch Archive tool
If archiving has not been done on a regular basis, you may have many matters which can be archived. You can use the Batch Archive tool to do this.
Navigate to Clients & Matters > Matters > Batch Archive.
The system will now request further details to narrow down the search:
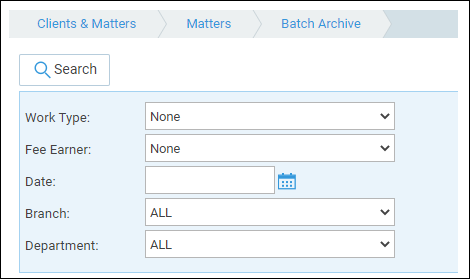
Work Type – select a work type to check for archivable matters.
Fee Earner – select a fee earner to check all the matters owned by a particular fee earner which can be archived.
Date – this will be used as the archive date for any matters archived using this process, and must be on or after the last posting on the client’s ledger. For example, the last posting date on a particular matter is 25/8/2020, which leaves the client ledger clear. The date must be entered as 25/8/2020 or afterwards to pick up this matter.
Branch – select a branch for matters to be archived.
Department – select a department for matters to be archived.
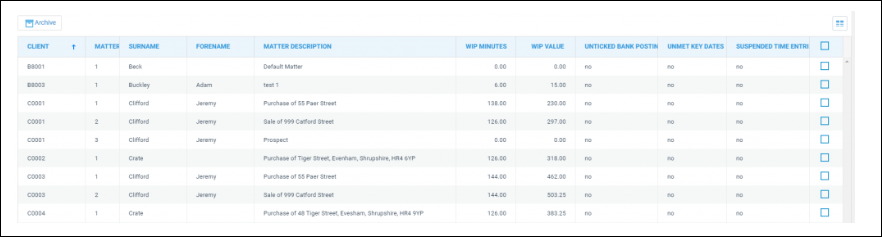
Once you have made any selections here, click the Search button. You must at least have filled in the date field. The system will search for any matters which can now be archived, and display them, noting whether there is any WIP, unticked bank postings, unmet key dates or suspended time entries:
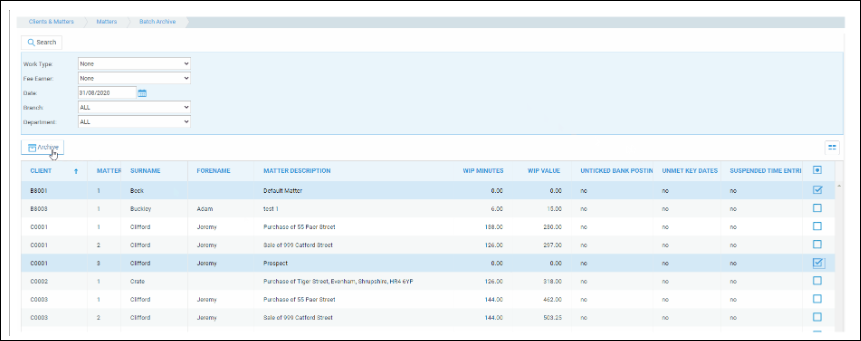
Click the tick box on the right hand side of the matters you want to archive, and click the Archive button:
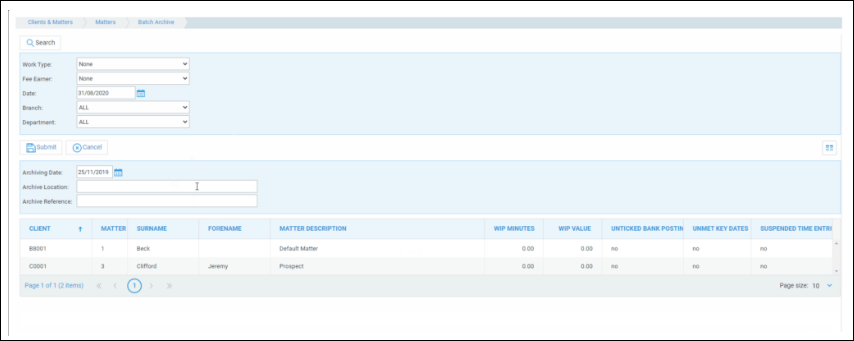
Osprey will now display just the matters you selected, and allow you to enter their Archive Date, Location and Reference. Click Submit once you have entered these.
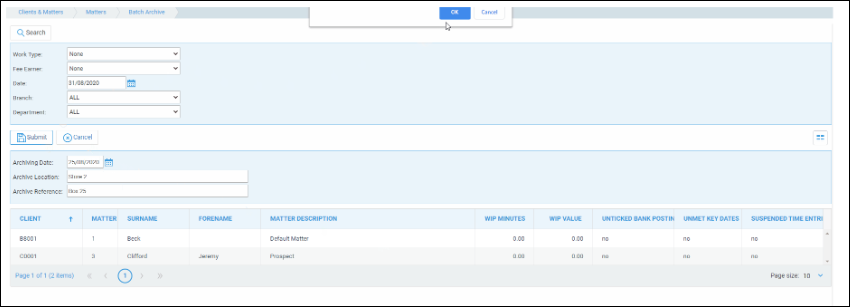
Osprey will then return to your previous search, and these matters are archived.
Restoring an Archived Matter
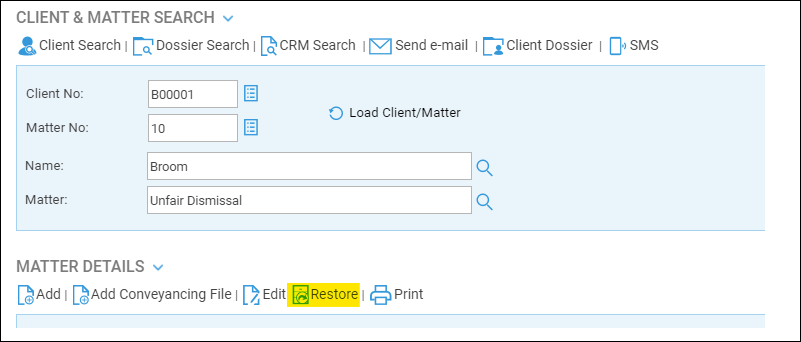
If you have archived a matter by mistake, or a query comes up meaning that you need to reopen the matter, this is a simple process. Simply navigate to the clients and matters area of Osprey, and search for/enter the client and matter number to locate the required matter.
Then, click the Restore button:
and click Yes when prompted:
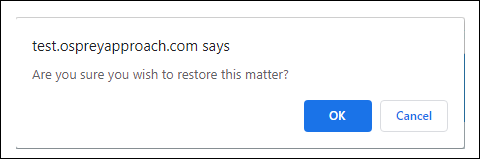
The matter will now be restored.